
Today I had a little help in my craft room...the boys gave me some time to help me get things down from high shelves, reorganise containers, that sort of thing. It has cut down quite a bit on the number of containers I have to house on my shelving, (I love rationalisation!), and I now finally have my stamps where I can access them quite easily.
There are still things I want to change, but at least a start has been made.
I have now spent almost two years on a purchasing moratorium, being determined to cut down on the surplus equipment and supplies I have on hand. These simply clutter up my space and I have always had issues with clutter. It stifles me, and I seem to spend more time tidying than actually crafting, some days.
It seems though, that I still have quite enormous amounts of paper scraps, wooden embellishments, metallic bits and pieces...you name it that I can't see my self ever using up. I may have to find somewhere I can donate some of it to, although I hesitate to offer it when it is not all "new".
Maybe though, I can find an aged care facility I can make a pile of simple cards for, They are always good for little fundraising events. Or maybe I could offload some of the basic excess bits and bobs to an activity department for use in craft groups. I still have a few contacts within the aged care industry hereabouts...I must follow up on that thought...
One thing this enforced period of relative "austerity" has taught me is that one can always find a solution to a supply item one needs in ways that do not require spending. I don't have the resources any longer that allowed me, while I was working, to purchase an item for crafting online, and think only after it's arrival how frequently I might use it. Also I have always had space to store anything I wanted, so the pile tended simply to grow. No longer!
Anyhow, to get back to the topic for today, during the course of today's small upheaval, I pulled out my Jelly plate. It's a home made version so I won't use the commercial product spelling. I have been wanting to try a technique I saw on a video recently, produced by Kate Crane. Her process uses very little acrylic paint and plenty of water, and produces "water colour" effect prints.
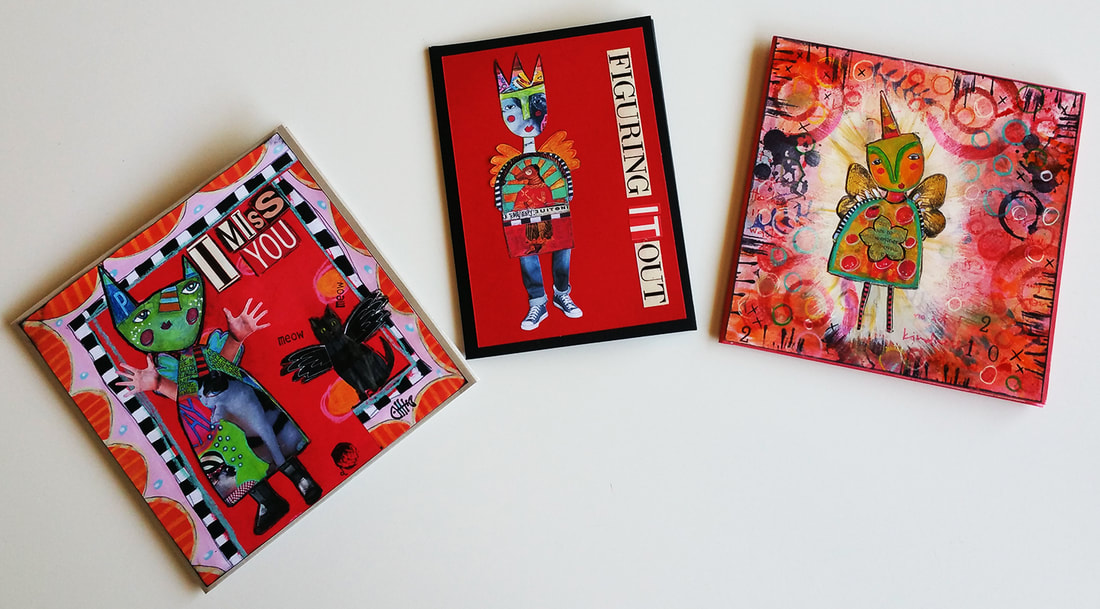
I have been making some quirky collage pieces a la Crafty Hodges, (Thank you Joanne), and needed some background papers.
My Jell plate has always been a tad wonky, as I set it originally in a square Decor container...handy, as I simply stored and used the plate sitting inside the lid, and reversed the box over the top to store it...the surface of the plate, however, had a dip in the centre from the moulding of the container, along with several lines.
In it's previous life as a cake box, some eager cake-cutting beaver had attacked the contents too vigorously with the cake knife, leaving small cuts on the bottom surface of the box...it is amazing how these insignificant lines on the box transfer to a print pulled from the jell plate...
There are still things I want to change, but at least a start has been made.
I have now spent almost two years on a purchasing moratorium, being determined to cut down on the surplus equipment and supplies I have on hand. These simply clutter up my space and I have always had issues with clutter. It stifles me, and I seem to spend more time tidying than actually crafting, some days.
It seems though, that I still have quite enormous amounts of paper scraps, wooden embellishments, metallic bits and pieces...you name it that I can't see my self ever using up. I may have to find somewhere I can donate some of it to, although I hesitate to offer it when it is not all "new".
Maybe though, I can find an aged care facility I can make a pile of simple cards for, They are always good for little fundraising events. Or maybe I could offload some of the basic excess bits and bobs to an activity department for use in craft groups. I still have a few contacts within the aged care industry hereabouts...I must follow up on that thought...
One thing this enforced period of relative "austerity" has taught me is that one can always find a solution to a supply item one needs in ways that do not require spending. I don't have the resources any longer that allowed me, while I was working, to purchase an item for crafting online, and think only after it's arrival how frequently I might use it. Also I have always had space to store anything I wanted, so the pile tended simply to grow. No longer!
Anyhow, to get back to the topic for today, during the course of today's small upheaval, I pulled out my Jelly plate. It's a home made version so I won't use the commercial product spelling. I have been wanting to try a technique I saw on a video recently, produced by Kate Crane. Her process uses very little acrylic paint and plenty of water, and produces "water colour" effect prints.
I have been making some quirky collage pieces a la Crafty Hodges, (Thank you Joanne), and needed some background papers.
My Jell plate has always been a tad wonky, as I set it originally in a square Decor container...handy, as I simply stored and used the plate sitting inside the lid, and reversed the box over the top to store it...the surface of the plate, however, had a dip in the centre from the moulding of the container, along with several lines.
In it's previous life as a cake box, some eager cake-cutting beaver had attacked the contents too vigorously with the cake knife, leaving small cuts on the bottom surface of the box...it is amazing how these insignificant lines on the box transfer to a print pulled from the jell plate...
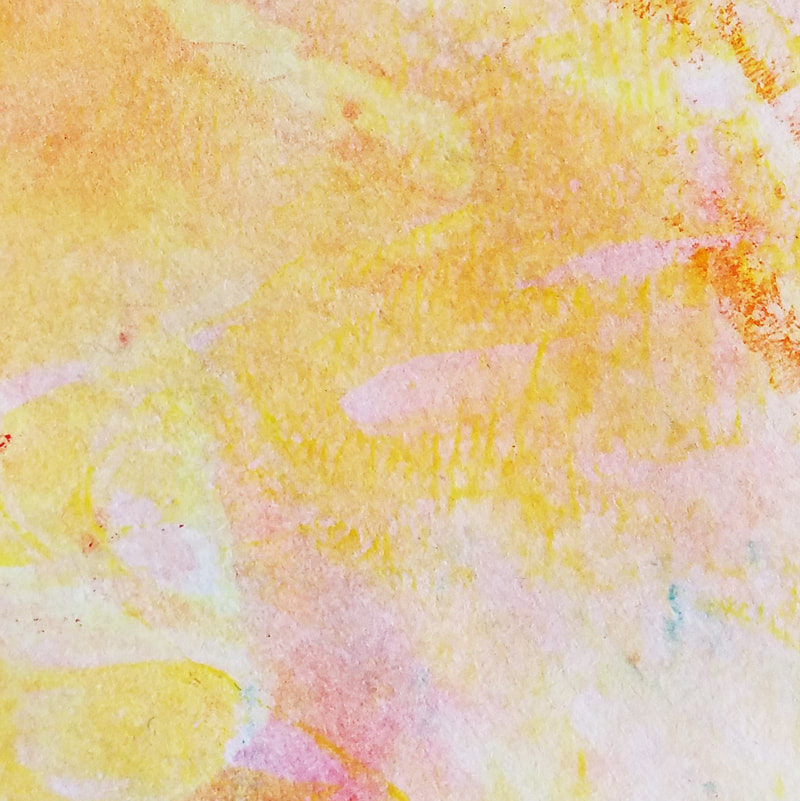
You can clearly see the cake cutter's line in this print, pulled from my first jell plate...
While I had the plate out from it's place, I decided to bite the bullet and melt it down. Chris had reminded me of an old fairly straight-sided tin slice pan that I sometimes use for fudge of slices. It measures 25.5 cm x 18 cm and is 2 cm deep, I decided to give it a try.
I broke up the old plate into smaller pieces and popped them into a saucepan and set it on the cook top on a very low heat. I kept a fairly close eye on it, not wishing to over heat the mixture.
I kept chopping away at the larger pieces as they slowly dissolved and eventually it was all melted and clear. I removed it immediately and poured it gently into the pan. A few small bubbles did appeared on the surface but I used a piece of kitchen towel to drag those away while it was still hot.
I left it to cool then popped it into the refrigerator to fully set.
I ran a thin bladed knife carefully all around each of the sides right down to the bottom of the pan, just to break the seal. I turned it upside down on the work surface and held my hands on the bottom of the pan for a couple on minutes, until the warmth was enough to release it.
It is beautifully flat and although not quite as large as the first one, it is a little thicker and more sturdy.
I am very glad I tried this.
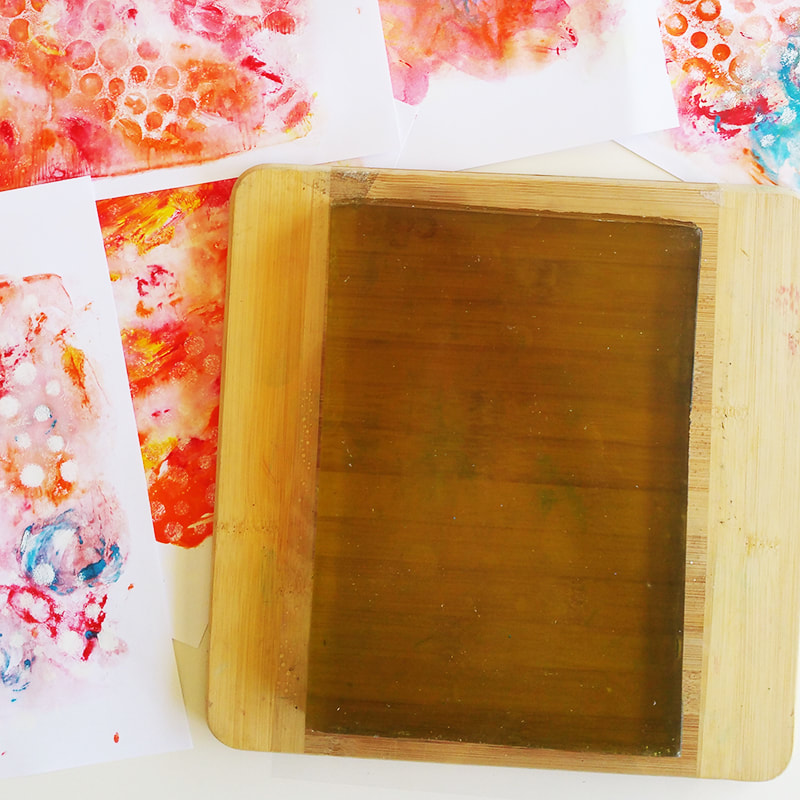
I have placed the plate onto a sheet of acetate, for ease of moving it around.

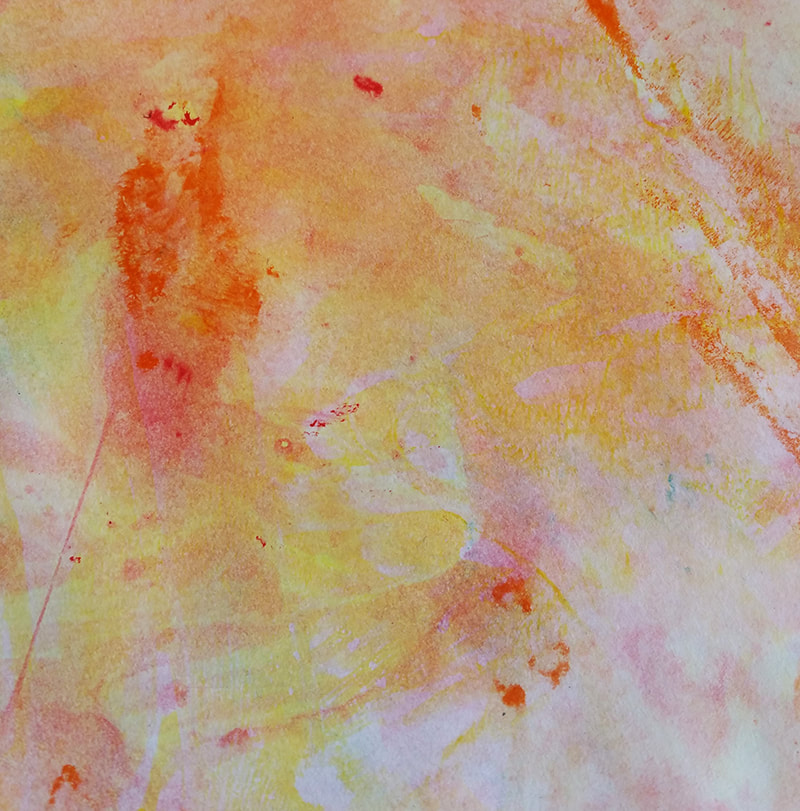
The watery effect, one I simply hadn't thought to try until seeing the video, can still be vibrant. I made four of five prints from each application of paint, drying and layering between each colour to prevent muddying the outcome.
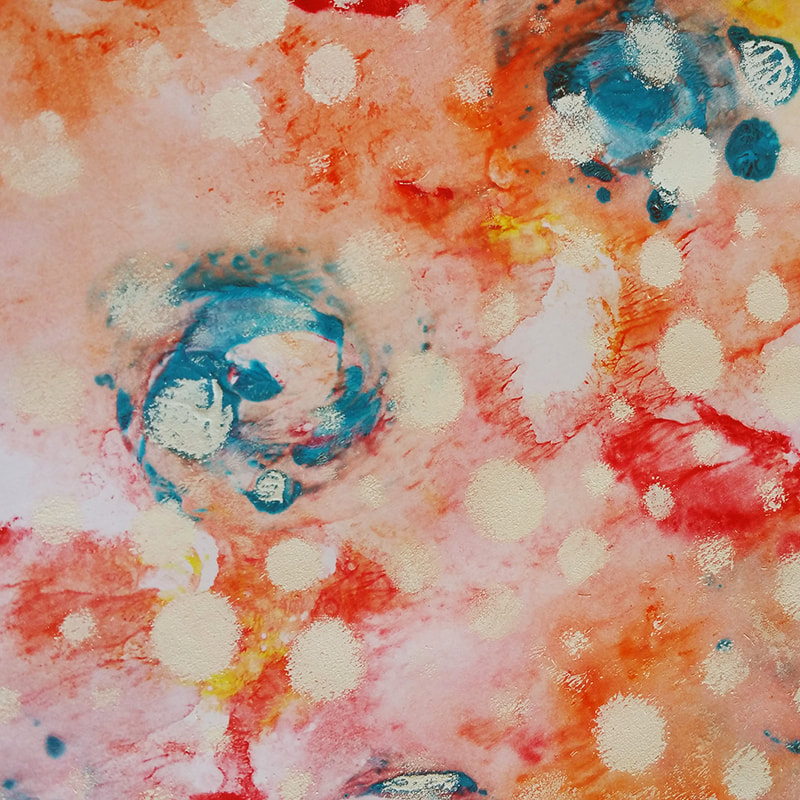
I kept the sheets in order, so they range nicely from vibrant to very pastel in hue...
This was the palest print, I haven't added any additional layers to this one yet. The previous two have had white paint applied through a stencil.
These are the three snail journals I am working on. I thought they might be something fun to send to the smalls...
Well, that's it for today. I can recommend having your own melt down if the Gelli-Jel plate you are using has issues. It works a treat!
Bye,
Di
Bye,
Di


 RSS Feed