
Well, finally a "single" layer card that I am happy enough with to post. A dear niece is about to celebrate her birthday...I hope she appreciates it, it feels as if I have been undertaking the labours of Hercules just to get to this point on my journey towards the degree of card making insouciance. Other more skilled folk disclaim "I'll be making a few more dozen of these before I do dinner, walk the dog and sweep the snow".
I sound bitter, I know, and I am. I have been challenging myself over the past few days to understand thee single layer card. It has so many different definitions. Look at the challenge blogs and you will see what I mean. I define a single layer card as just that, no other layers at all...but I find them with the card front attached to a card base, extra layers of cardstock and labels, banners, frames et al...you name it!
It is just so difficult getting all the design, colour and perfect stamping stars to align at the one point in time and space - on the front of a card base. However, I have learned a few things on my painful and extended journey.
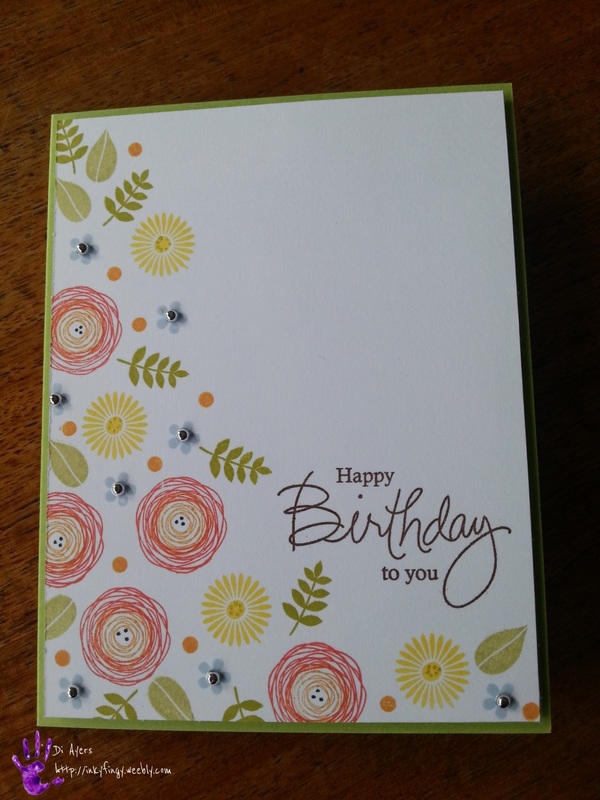
1. I have decided not to worry about it - a single layer card for me is what I make it, as it is for every other card maker in the world! (Major moment, this). This one, I decided, was to be attached to a card base, AND I also added some tiny sprinkles on the small blue flowers...see, I'm relaxing, really!
2. I don't try to heat emboss on a single layer card now...the slight warping that inevitably occurs cannot be corrected enough for me. I found that even a very heavy book application for twenty four hours does not completely remove the warp...so I decided the simple solution for me is just not to go there. I love the colour and shine that heat embossing gives a sentiment or other item on a card, but there are many other multilayer cards that this technique can be used on with less angst, and other ways to add shine.
3. I now practice with the stamp on a piece of scrap paper before applying it to the card base...several times if necessary. Some inks are better suited to specific stamp composition types, or may need juicing up if they haven't been out for a while. Better to miss-stamp on scrap paper than on the card base, or identify the inked up overhang on an unmounted stamp than risk hysterics when you ruin the whole thing with your last stamp application.
4. I spend time to plan the card - (really important for me, this aspect). I used just to meander into my craft area and fiddle about, hoping a stunning card would happen...this approach often lead to an over-stamped or over-embellished piece of binable nonsense. Play time is important when you are new to the craft, or when trying out new equipment or a new design thought...it becomes far less so when you realise you have just wasted the last piece of that midnight blue card stock that is the centre point of your proposed card. Planning is particularly important when choosing colours, I now practice the ink colours with the stamps as well as cardstock colours I want to use before the final decision.
5. I now assemble my all planned equipment on my work top prior to commencement. This stops me rummaging through stamp sets, dies and embellies, looking for "that something extra". It helps to keep me on track with my planned card.
That's about it, I have learned a lot by focussing (finally) on my shortcomings. Today I went to our local library and found a good card and scrapbooking section. I now have a few books to go through...my next challenge is watercolouring...mmm could take a while that one.
Anyhoo...here is the card I made for Jayne...
I sound bitter, I know, and I am. I have been challenging myself over the past few days to understand thee single layer card. It has so many different definitions. Look at the challenge blogs and you will see what I mean. I define a single layer card as just that, no other layers at all...but I find them with the card front attached to a card base, extra layers of cardstock and labels, banners, frames et al...you name it!
It is just so difficult getting all the design, colour and perfect stamping stars to align at the one point in time and space - on the front of a card base. However, I have learned a few things on my painful and extended journey.
1. I have decided not to worry about it - a single layer card for me is what I make it, as it is for every other card maker in the world! (Major moment, this). This one, I decided, was to be attached to a card base, AND I also added some tiny sprinkles on the small blue flowers...see, I'm relaxing, really!
2. I don't try to heat emboss on a single layer card now...the slight warping that inevitably occurs cannot be corrected enough for me. I found that even a very heavy book application for twenty four hours does not completely remove the warp...so I decided the simple solution for me is just not to go there. I love the colour and shine that heat embossing gives a sentiment or other item on a card, but there are many other multilayer cards that this technique can be used on with less angst, and other ways to add shine.
3. I now practice with the stamp on a piece of scrap paper before applying it to the card base...several times if necessary. Some inks are better suited to specific stamp composition types, or may need juicing up if they haven't been out for a while. Better to miss-stamp on scrap paper than on the card base, or identify the inked up overhang on an unmounted stamp than risk hysterics when you ruin the whole thing with your last stamp application.
4. I spend time to plan the card - (really important for me, this aspect). I used just to meander into my craft area and fiddle about, hoping a stunning card would happen...this approach often lead to an over-stamped or over-embellished piece of binable nonsense. Play time is important when you are new to the craft, or when trying out new equipment or a new design thought...it becomes far less so when you realise you have just wasted the last piece of that midnight blue card stock that is the centre point of your proposed card. Planning is particularly important when choosing colours, I now practice the ink colours with the stamps as well as cardstock colours I want to use before the final decision.
5. I now assemble my all planned equipment on my work top prior to commencement. This stops me rummaging through stamp sets, dies and embellies, looking for "that something extra". It helps to keep me on track with my planned card.
That's about it, I have learned a lot by focussing (finally) on my shortcomings. Today I went to our local library and found a good card and scrapbooking section. I now have a few books to go through...my next challenge is watercolouring...mmm could take a while that one.
Anyhoo...here is the card I made for Jayne...
I have also been fiddling about with explosion card boxes, not because I particularly like them, but I like to know how these things work...I think they could make a very pretty and interesting new baby, new home, maybe even a party invitation card, for the right occasion.
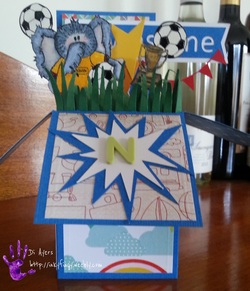
I finally managed to get my head around how to adhere and position the various components on the cross bars within the box, and ended up making one each for my young grandsons. The photos are horrible, but as the boxes themselves are only first trys, I didn't redo the pics. I will post them off come Monday...and I don't think they will have a very long shelf-life once they arrive in NSW! The boys are going to be just as interested as I was in how they go together...and come apart! This one is for Nicholas, seven, who loves his soccer, the banner at the back reads #AWESOME. It has bouncing balls, stars, cheering hands, a trophy and at the front grass...
I finally managed to get my head around how to adhere and position the various components on the cross bars within the box, and ended up making one each for my young grandsons. The photos are horrible, but as the boxes themselves are only first trys, I didn't redo the pics. I will post them off come Monday...and I don't think they will have a very long shelf-life once they arrive in NSW! The boys are going to be just as interested as I was in how they go together...and come apart! This one is for Nicholas, seven, who loves his soccer, the banner at the back reads #AWESOME. It has bouncing balls, stars, cheering hands, a trophy and at the front grass...
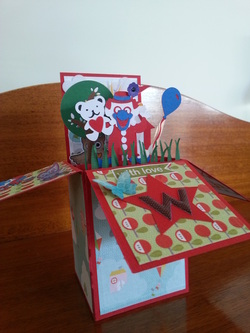
This box is for Wyatt, who has turned four. It has a circus tent, a merry-go-round horse, an owl, a tree, grass, clown, balloon and teddy bear. They love to receive anything through the post, especially when they arrive addressed to each in person, makes their day. I knew I make cards for a reason!
Thanks for visiting,
Di
Di


 RSS Feed